Why You’ll Love This Recipe
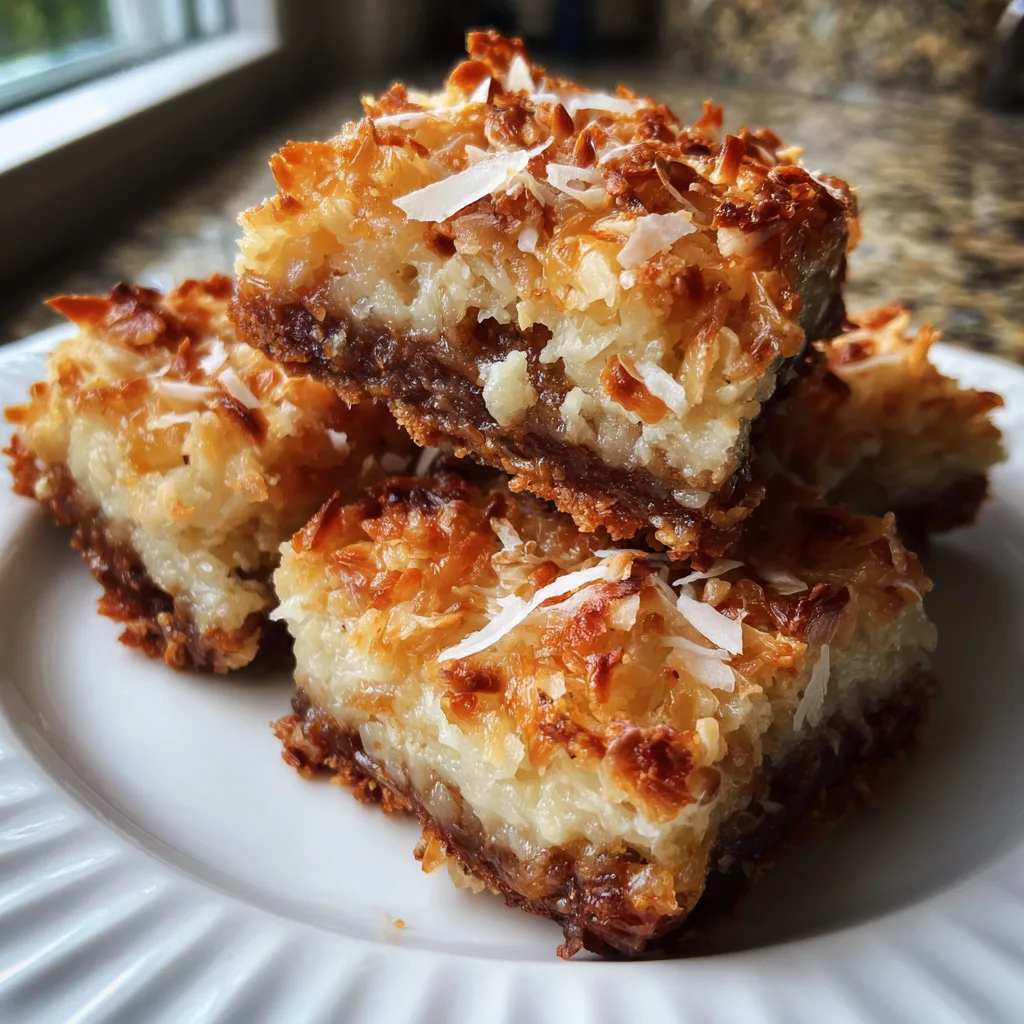
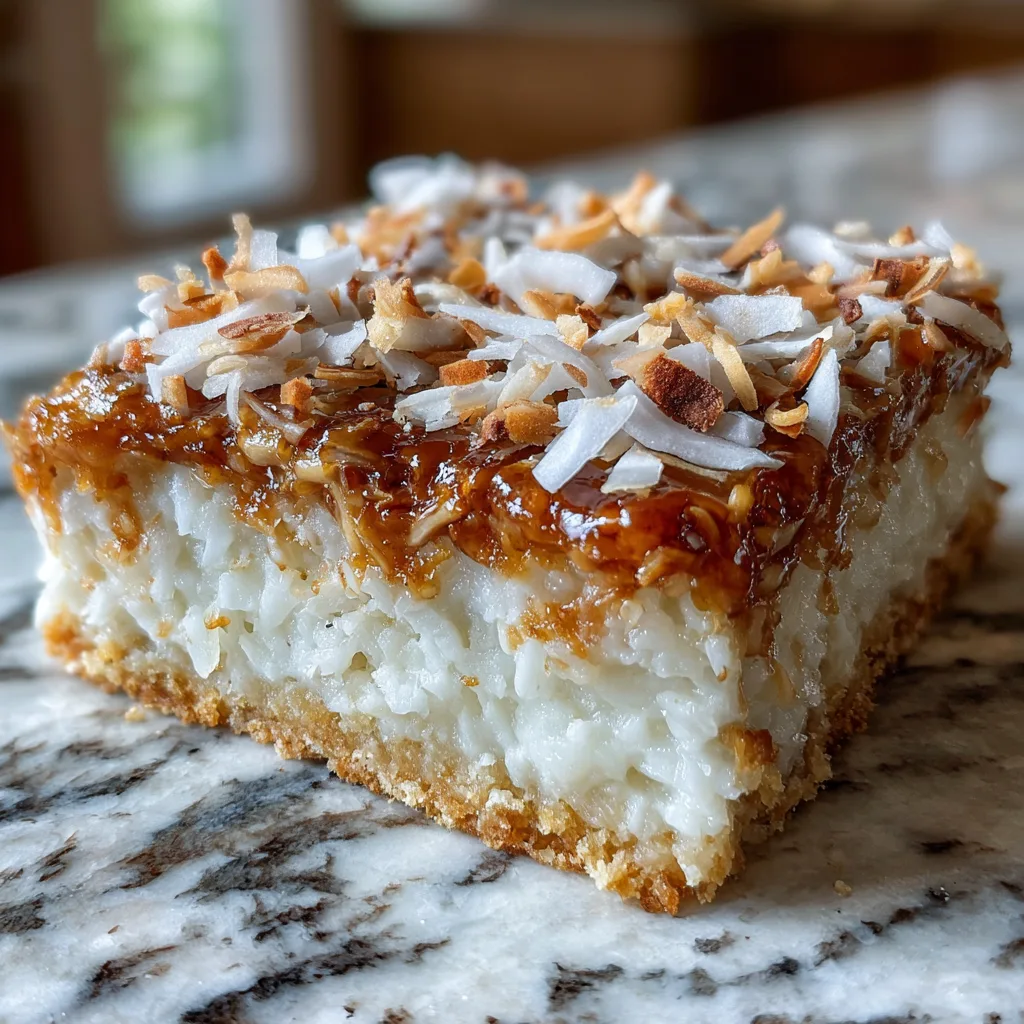
These Coconut Dream Bars are rich, chewy, and unapologetically indulgent. They combine a buttery crust with a soft coconut topping that stays moist for days. I love how effortlessly they come together, yet the final result tastes like something far more elaborate. Every bite delivers sweetness, texture, and comfort, making them perfect for gatherings, bake sales, or quiet evenings with coffee.
Print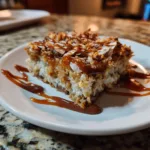
Coconut Dream Bars – Chewy, Buttery Squares with Irresistible Coconut Flavor
- Total Time: 50 minutes
- Yield: 12 bars
- Diet: Vegetarian
Description
Coconut Dream Bars are rich, buttery dessert bars featuring a soft shortbread crust topped with a sweet, chewy coconut layer baked until golden and irresistible.
Ingredients
- 1/2 cup (115 g) unsalted butter, softened
- 1/4 cup (50 g) granulated sugar
- 1 cup (125 g) all-purpose flour
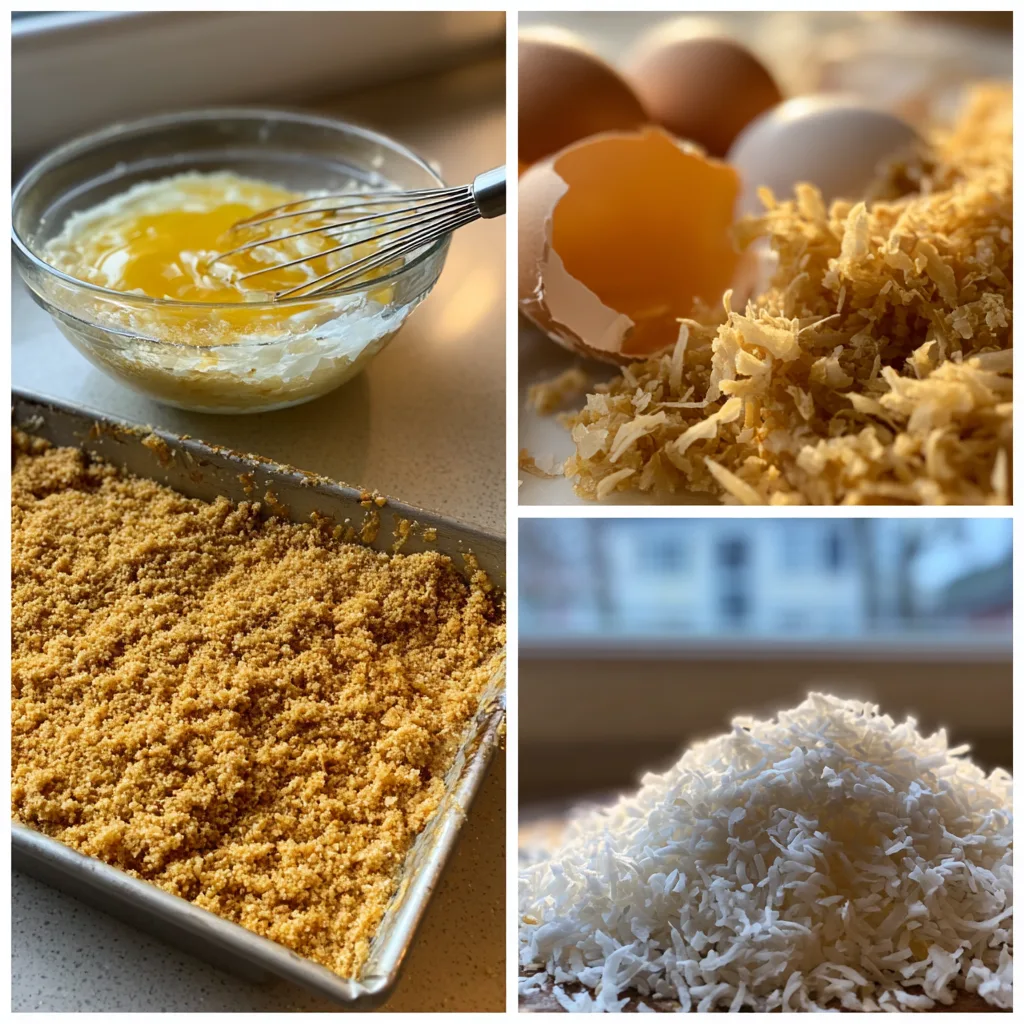
- 2 large eggs
- 3/4 cup (150 g) brown sugar
- 1 tsp vanilla extract
- 1 tbsp all-purpose flour
- 1/4 tsp salt
- 1 1/2 cups (120 g) sweetened shredded coconut
Instructions
- Preheat oven to 350°F (175°C). Grease or line an 8×8-inch baking pan.
- Cream together butter and granulated sugar until light and fluffy.
- Mix in 1 cup flour until a soft dough forms.
- Press dough evenly into the prepared pan to form the crust.
- Bake crust for 12–15 minutes, or until lightly golden.
- While crust bakes, whisk eggs and brown sugar until smooth.
- Add vanilla, 1 tablespoon flour, salt, and shredded coconut; mix well.
- Pour coconut mixture evenly over the hot crust.
- Return to oven and bake for 20–25 minutes until set and golden on top.
- Cool completely before cutting into bars.
Notes
- For extra flavor, toast the coconut lightly before mixing.
- Bars firm up as they cool, so allow full cooling time.
- Store in an airtight container for up to 4 days.
- Prep Time: 15 minutes
- Cook Time: 35 minutes
- Category: Dessert
- Method: Baking
- Cuisine: American
Ingredients
(Tip: You can find the complete list of ingredients and their measurements in the recipe card below.)
Butter
Butter creates the base of these bars, giving the crust its rich flavor and tender texture. Melted butter helps the crust bind evenly and bake into a firm, sliceable layer.
All-Purpose Flour
Flour provides structure and stability to the crust. It balances the butter so the base holds the coconut topping without becoming greasy or crumbly.
Granulated Sugar
Granulated sugar lightly sweetens the crust and promotes gentle browning, adding subtle depth to the overall flavor.
Eggs
Eggs are essential for the topping, creating a soft, custard-like consistency that sets beautifully while remaining chewy.
Sweetened Shredded Coconut
This ingredient defines the recipe. It adds sweetness, moisture, and a satisfying chew that contrasts perfectly with the buttery crust.
Brown Sugar
Brown sugar enhances the topping with warmth and a mild caramel note, intensifying the coconut flavor.
Vanilla Extract
Vanilla smooths and rounds out the sweetness, making the bars taste richer and more balanced.
Salt
Salt sharpens the flavors and keeps the dessert from tasting overly sweet.
Directions
Preheat the oven and line a baking pan with parchment paper. In a bowl, mix melted butter, flour, granulated sugar, and salt until a soft dough forms. Press the mixture firmly and evenly into the prepared pan. Bake until the crust is just beginning to turn golden, then remove it from the oven and allow it to cool slightly.
In another bowl, whisk the eggs with brown sugar until smooth. Stir in the vanilla extract, then fold in the shredded coconut until fully coated. Spread the coconut mixture evenly over the warm crust, smoothing the surface gently. Return the pan to the oven and bake until the topping is set and lightly golden. Allow the bars to cool completely before slicing to ensure clean edges and the perfect chewy texture.
Equipment needed : Must-Have Tools to Get Rolling
Here’s what you’ll want to have on hand:
Silicone Spatula – Durable, heat-resistant silicone spatula perfect for mixing, scraping, and spreading. Gentle on non-stick cookware and easy to clean.
Large pot – You’ll need this to boil the whole cabbage head and soften the leaves.
large bowl –Spacious, durable large bowl ideal for mixing, serving, or food preparation. Made from sturdy material and easy to clean.
Sharp knife – For coring the cabbage and slicing out the thick stem in each leaf. A paring knife works best.
Mixing bowl – A big bowl makes it easier to combine your meat and rice filling evenly.
Cutting board – For prepping cabbage leaves and rolling them like a pro.
Full-Size Blender – is a powerful kitchen appliance for making smoothies, soups, and sauces in large batches.
3-in-1 Air Fryer – This versatile 3-in-1 air fryer offers Air Fry for healthier meals with less oil, Bake for bakery-quality desserts and treats, and Reheat to bring leftovers back to life with crispy, flavorful results
Servings and timing
This recipe makes approximately 16 bars, with 15 minutes of preparation time, 30–35 minutes of baking time, and about 45 minutes of cooling time.
Storage/reheating
Store the bars in an airtight container at room temperature for up to three days or refrigerate for up to one week. Bring them to room temperature before serving for the best texture.
Variations and Customizations
Coconut Dream Bars are easy to adapt without losing their charm. Adding chopped nuts such as almonds or pecans introduces crunch and contrast. A drizzle of melted chocolate over the cooled bars creates a more decadent dessert, while chocolate chips mixed into the topping add bursts of richness.
For a lighter sweetness, reduce the brown sugar slightly and balance the flavor with extra vanilla. You can also experiment with citrus zest, such as lime or orange, to brighten the coconut notes. If gluten-free baking is preferred, a high-quality gluten-free flour blend can replace all-purpose flour with minimal texture change.
Nutrition and Dietary Info
| Nutrient | Per Serving |
|---|---|
| Calories | 290 |
| Protein (g) | 4 |
| Carbs (g) | 32 |
| Fat (g) | 17 |
| Saturated Fat (g) | 11 |
| Fiber (g) | 2 |
| Sugar (g) | 22 |
| Sodium (mg) | 120 |
Expert Tips & Customizations
Firm Base, Clean Slices
Press the crust evenly and firmly to prevent crumbling after baking.
Balanced Sweetness
Taste the coconut mixture before baking and adjust sugar slightly if needed.
Professional Finish
Let the bars cool fully before cutting for sharp, bakery-style squares.
FAQs
Can I use unsweetened coconut?
Yes, but the bars will be less sweet and slightly drier.
Do these bars need to be refrigerated?
Refrigeration is optional but extends freshness.
Can I freeze Coconut Dream Bars?
Yes, freeze them for up to two months in an airtight container.
Why is my topping too dark?
The bars may be overbaked or placed too high in the oven.
Can I make these ahead of time?
Yes, they taste even better the next day once fully set.
Are these suitable for large gatherings?
Absolutely, they travel well and serve cleanly.
Conclusion
Coconut Dream Bars are proof that simple ingredients can create a truly memorable dessert. With their buttery base and chewy coconut topping, they offer comfort, flavor, and reliability in every batch. Whether served casually or dressed up with custom additions, these bars are always a crowd-pleasing success.
Hungry for more? Visit our website for full recipes and follow us on Pinterest for daily foodie inspo you’ll love to pin!