Introduction
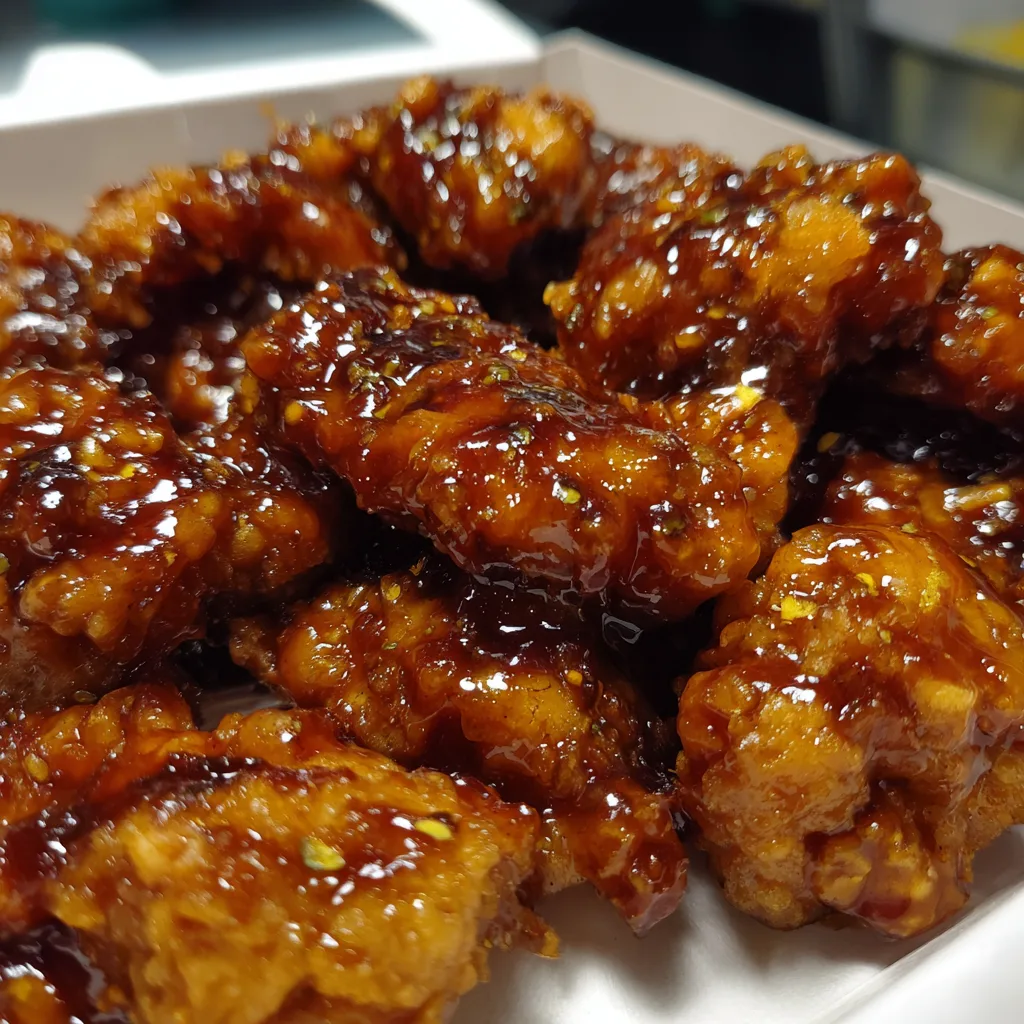
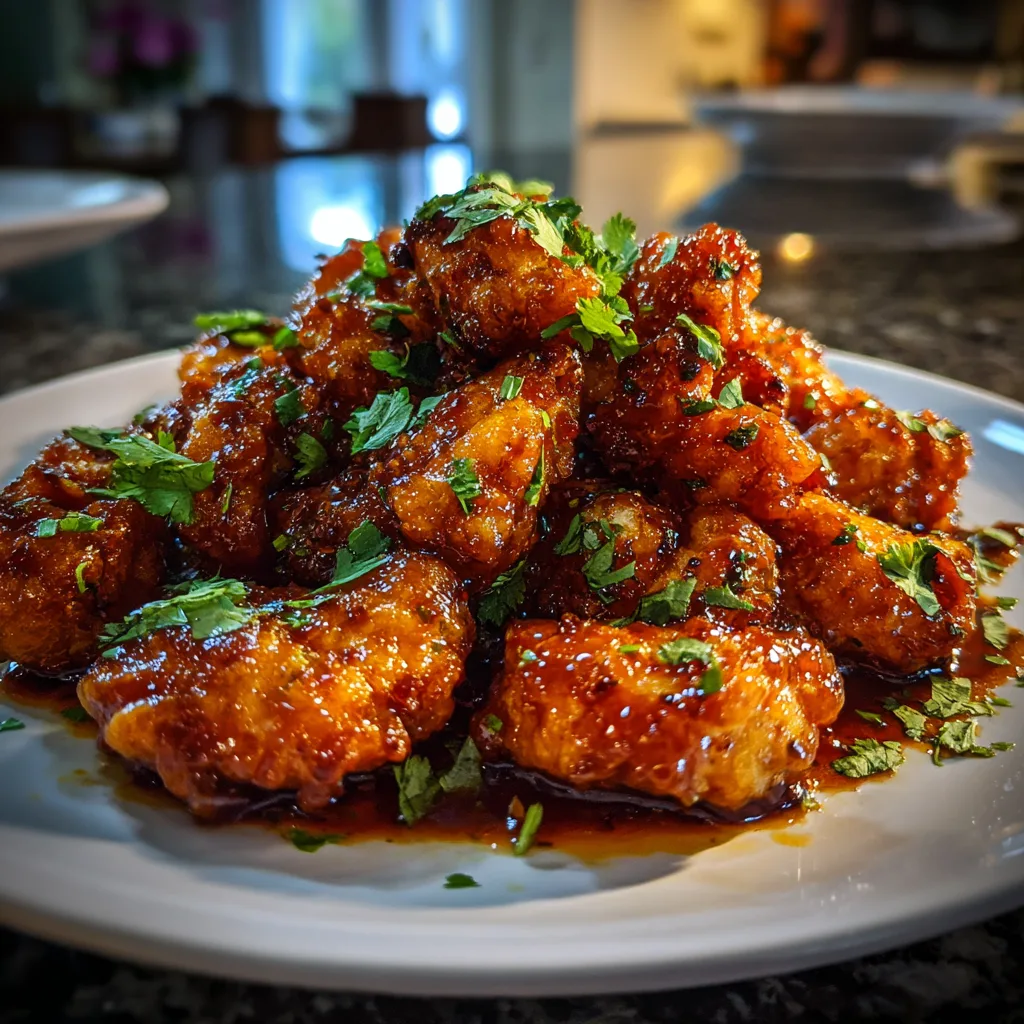
If you have ever craved the bold, sweet, and smoky flavor of Chili’s Honey Chipotle Chicken Crispers, this homemade version brings that same irresistible taste straight to your kitchen. These crispy chicken tenders are coated in a crunchy golden crust and tossed in a sticky honey chipotle sauce that perfectly balances sweetness and heat. The first time I recreated this dish at home, I was surprised at how closely it captured that restaurant-style flavor, especially when served fresh and hot. I even tried baking a batch once for a lighter option, and while frying delivers the crispiest texture, the oven method still worked beautifully. Whether you are preparing a family dinner, game-day platter, or indulgent weekend treat, this recipe guarantees bold flavor and satisfying crunch in every bite.
Print
Chili’s Honey Chipotle Chicken Crispers – Crispy, Sweet, and Smoky Perfection at Home
- Total Time: 1 hour
- Yield: 4 servings
- Diet: Halal
Description
Chili’s Honey Chipotle Chicken Crispers are crispy, golden fried chicken tenders tossed in a sweet and smoky honey chipotle sauce with a perfect balance of heat and sweetness, inspired by the popular restaurant favorite.
Ingredients
- 1 1/2 lbs chicken tenders
- 1 cup buttermilk
- 1 cup all-purpose flour
- 1/2 cup cornstarch
- 1 teaspoon paprika
- 1/2 teaspoon garlic powder
- 1/2 teaspoon onion powder
- 1/2 teaspoon salt
- 1/2 teaspoon black pepper
- Vegetable oil for frying
- 1/2 cup honey
- 2 tablespoons chipotle peppers in adobo sauce, minced
- 1 tablespoon adobo sauce (from the can)
- 1 tablespoon ketchup
- 1 teaspoon apple cider vinegar
Instructions
- Place chicken tenders in buttermilk and marinate for at least 30 minutes (or up to 4 hours).
- In a bowl, whisk together flour, cornstarch, paprika, garlic powder, onion powder, salt, and black pepper.
- Heat vegetable oil in a deep skillet to 350°F (175°C).
- Remove chicken from buttermilk, allowing excess to drip off, then dredge in flour mixture until fully coated.
- Fry chicken in batches for 4–6 minutes until golden brown and cooked through (internal temperature 165°F).
- Transfer to a wire rack to drain excess oil.
- In a saucepan over medium heat, combine honey, minced chipotle peppers, adobo sauce, ketchup, and apple cider vinegar.
- Simmer for 3–5 minutes until slightly thickened.
- Toss fried chicken tenders in the warm honey chipotle sauce until evenly coated.
- Serve immediately with your favorite sides.
Notes
- Adjust chipotle amount to control spice level.
- For extra crispiness, double dredge the chicken.
- You can bake at 425°F for 18–22 minutes or air fry at 400°F for 10–12 minutes as a lighter option.
- Serve with ranch or blue cheese dressing for dipping.
- Prep Time: 40 minutes
- Cook Time: 20 minutes
- Category: Main Course
- Method: Frying
- Cuisine: American
Why You’ll Love This Recipe
This recipe delivers restaurant-quality chicken with a perfectly crispy coating and a glossy, flavor-packed sauce. The honey brings sweetness, while chipotle adds smoky heat that lingers just enough without overwhelming the palate. It is ideal for serving with fries, coleslaw, or even inside a sandwich. You can control the spice level and crispiness, making it adaptable to your preference. Best of all, it feels indulgent yet simple enough to prepare at home.
Ingredients
(Tip: You can find the complete list of ingredients and their measurements in the recipe card below.)
Chicken tenders
Chicken tenders are naturally tender and cook quickly, making them perfect for crispers. They provide a juicy interior that contrasts beautifully with the crunchy coating.
All-purpose flour
Flour forms the base of the breading, helping the coating adhere properly to the chicken.
Cornstarch
Cornstarch creates a lighter, crispier texture when fried. It is key to achieving that signature crunch.
Eggs
Eggs help bind the coating to the chicken and create structure during frying.
Buttermilk
Buttermilk tenderizes the chicken and adds subtle tanginess. I once substituted milk with a splash of lemon juice, and it worked surprisingly well.
Salt
Salt enhances the overall flavor of both the chicken and coating.
Black pepper
Adds mild heat and depth to the breading mixture.
Paprika
Paprika contributes color and a subtle smoky undertone.
Garlic powder
Provides savory depth without overpowering the sauce.
Vegetable oil
Neutral oil is essential for frying and achieving a golden, crispy crust.
Honey
Honey gives the sauce its signature sweetness and glossy finish.
Chipotle peppers in adobo sauce
These peppers provide smoky heat and bold flavor. Adjust the amount to control spice level.
Ketchup
Adds body and mild sweetness to balance the heat.
Apple cider vinegar
Vinegar brightens the sauce and balances the sweetness.
Directions
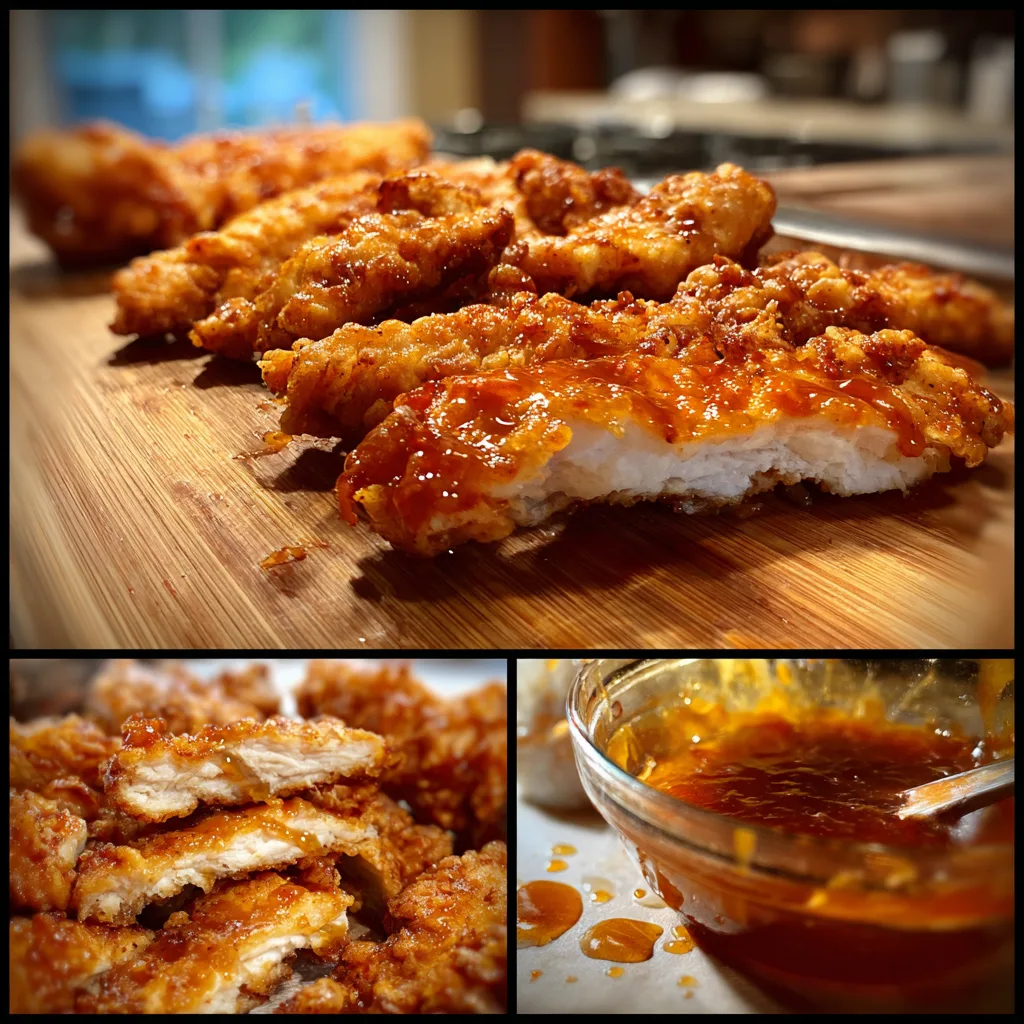
Begin by patting the chicken tenders dry. In one bowl, whisk together flour, cornstarch, salt, pepper, paprika, and garlic powder. In a separate bowl, whisk eggs and buttermilk until smooth.
Dip each chicken tender into the flour mixture, then into the egg mixture, and back into the flour mixture to create a thick coating. Press gently to ensure the breading adheres well.
Heat vegetable oil in a deep skillet to 350°F (175°C). Fry the chicken in batches for about 4 to 6 minutes per side, or until golden brown and fully cooked. Avoid overcrowding the pan to maintain oil temperature.
Transfer cooked chicken to a paper towel-lined plate to drain excess oil.
To prepare the sauce, blend honey, finely chopped chipotle peppers with a spoonful of adobo sauce, ketchup, and apple cider vinegar in a saucepan. Simmer over medium heat for 3 to 5 minutes until slightly thickened.
Toss the crispy chicken tenders in the warm sauce until evenly coated. Serve immediately for maximum crispness.
Equipment needed : Must-Have Tools to Get Rolling
Here’s what you’ll want to have on hand:
Silicone Spatula – Durable, heat-resistant silicone spatula perfect for mixing, scraping, and spreading. Gentle on non-stick cookware and easy to clean.
Large pot – You’ll need this to boil the whole cabbage head and soften the leaves.
large bowl –Spacious, durable large bowl ideal for mixing, serving, or food preparation. Made from sturdy material and easy to clean.
Sharp knife – For coring the cabbage and slicing out the thick stem in each leaf. A paring knife works best.
Mixing bowl – A big bowl makes it easier to combine your meat and rice filling evenly.
Cutting board – For prepping cabbage leaves and rolling them like a pro.
Full-Size Blender – is a powerful kitchen appliance for making smoothies, soups, and sauces in large batches.
3-in-1 Air Fryer – This versatile 3-in-1 air fryer offers Air Fry for healthier meals with less oil, Bake for bakery-quality desserts and treats, and Reheat to bring leftovers back to life with crispy, flavorful results
Servings and timing
This recipe serves 4 people. Preparation time is approximately 20 minutes, and cooking time is about 20 minutes. Total time is around 40 minutes.
Storage/reheating
Store leftover chicken in an airtight container in the refrigerator for up to three days. Reheat in an oven at 375°F (190°C) for about 10 to 12 minutes to restore crispness. Avoid microwaving, as it can soften the coating. The sauce can be stored separately and reheated gently on the stovetop.
Variations and Customizations
For a lighter option, bake the breaded chicken at 400°F (200°C) for 18 to 22 minutes, flipping halfway through. Spray lightly with cooking oil to help achieve a crisp finish.
You can increase the spice level by adding extra adobo sauce or a pinch of cayenne pepper to the breading. If you prefer a sweeter glaze, add an extra tablespoon of honey.
For extra crunch, try adding a small amount of panko breadcrumbs to the flour mixture. This creates an even crispier exterior.
I once experimented with adding a teaspoon of smoked paprika to the sauce, and it deepened the smoky flavor beautifully. You can also drizzle extra sauce on top instead of tossing the chicken fully if you prefer to keep the coating ultra-crisp.
Serve the chicken over waffles for a sweet-and-savory twist, or slice the tenders and use them in tacos or wraps.
Nutrition and Dietary Info
Approximate nutrition per serving:
| Nutrient | Per Serving |
|---|---|
| Calories | 620 kcal |
| Protein | 38 g |
| Carbohydrates | 58 g |
| Fat | 26 g |
| Saturated Fat | 5 g |
| Fiber | 2 g |
| Sugar | 22 g |
| Sodium | 980 mg |
Nutritional values may vary based on portion size and frying method.
Expert Tips & Customizations
Double Dredge for Extra Crunch
Dipping the chicken twice in flour ensures a thick, crispy coating.
Maintain Oil Temperature
Keep oil at 350°F to prevent greasy or undercooked chicken.
Simmer Sauce Gently
Overcooking the sauce can make it too thick or overly sweet.
Toss Just Before Serving
Coat the chicken in sauce right before serving to preserve crispness.
FAQs
Can I air fry the chicken instead of deep frying?
Yes, cook at 400°F (200°C) for about 12 to 15 minutes, flipping halfway through.
How spicy is the honey chipotle sauce?
It has moderate heat, but you can adjust by adding more or fewer chipotle peppers.
Can I make the sauce ahead of time?
Yes, the sauce can be prepared up to three days in advance and reheated gently before use.
What sides pair well with this dish?
Fries, coleslaw, corn on the cob, or mashed potatoes complement the flavors well.
Can I use chicken breasts instead of tenders?
Yes, slice chicken breasts into strips for similar results.
Why is my coating falling off?
Ensure the chicken is dry before dredging and press the coating firmly onto the surface.
Conclusion
Chili’s Honey Chipotle Chicken Crispers deliver a perfect balance of crispy texture and bold, sweet-smoky flavor. With the right technique and a few pantry staples, you can recreate this restaurant favorite at home. Whether served as a main dish or party platter, these crispers are guaranteed to impress with every crunchy, saucy bite.
Hungry for more? Visit our website for full recipes and follow us on Pinterest for daily foodie inspo you’ll love to pin!