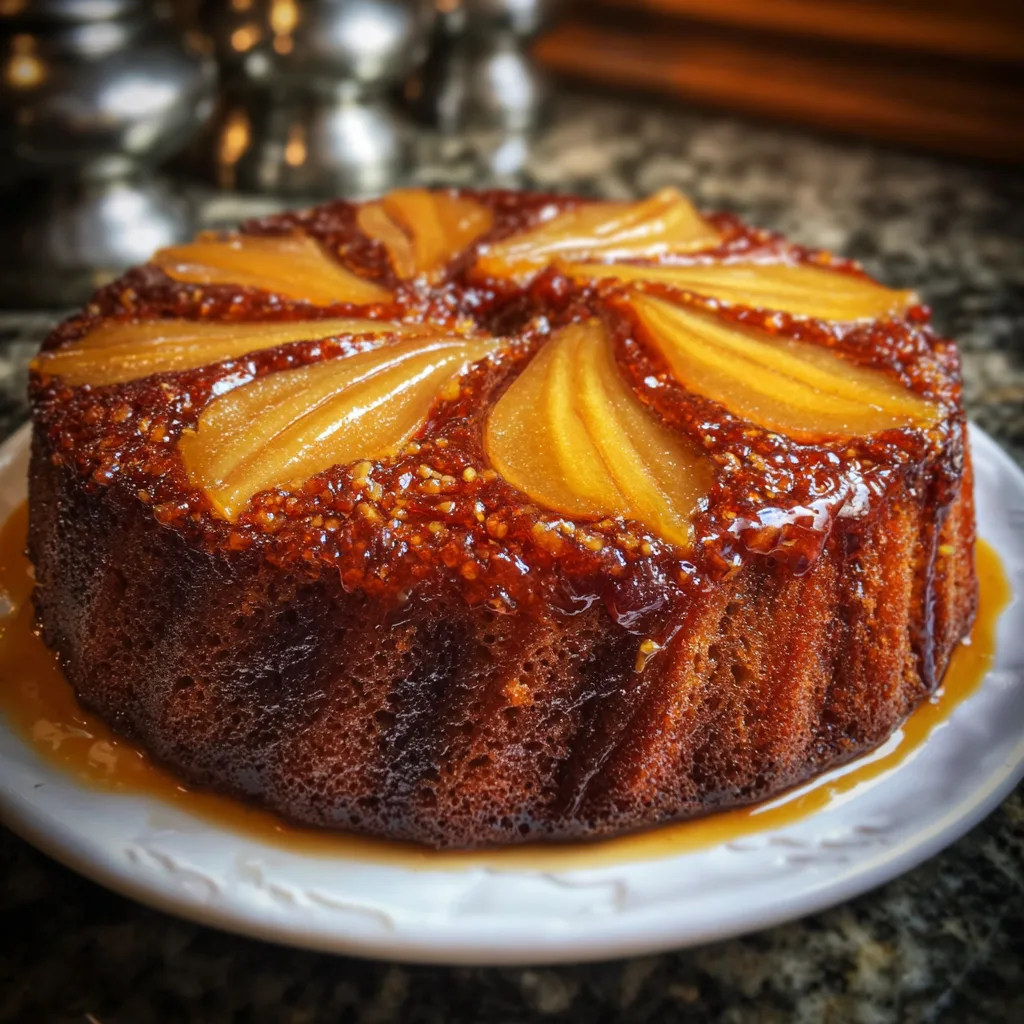
There is something incredibly comforting about the combination of pears and ginger, especially when baked into a soft, sticky cake that fills your kitchen with warmth. Sticky Pear and Ginger Cake is one of those timeless desserts that feels both rustic and elegant. The sweetness of ripe pears melts beautifully into the batter, while ginger adds a gentle heat that lingers in every bite. I first made this cake on a chilly afternoon when I had a few overripe pears sitting on the counter, and it instantly became a seasonal favorite.
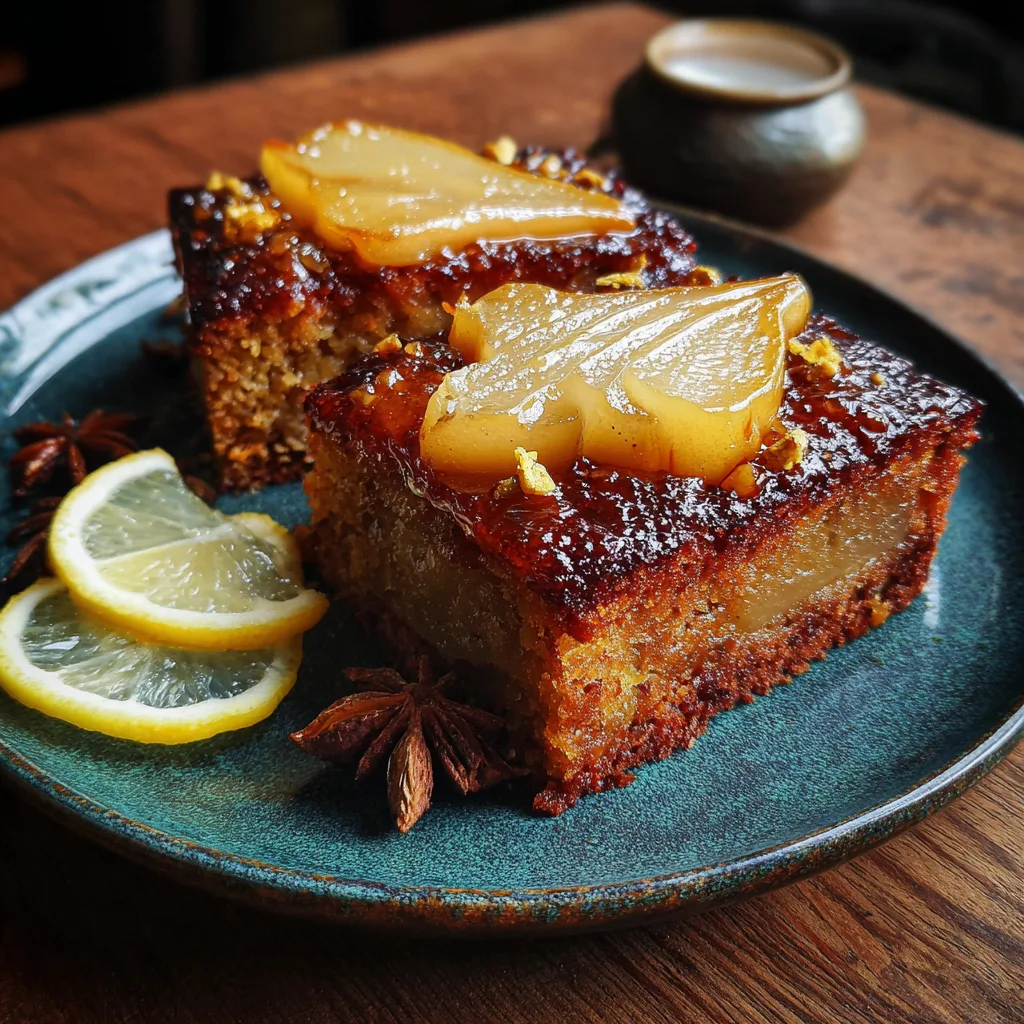
The texture is moist and tender, with a rich, almost caramel-like depth thanks to brown sugar and syrup. Whether served warm with a drizzle of cream or enjoyed as an afternoon treat with tea, this cake strikes the perfect balance between sweet and spiced. It is simple enough for everyday baking, yet impressive enough to serve guests.
Print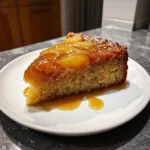
Sticky Pear and Ginger Cake – A Comforting, Spiced Dessert You’ll Crave All Season
- Total Time: 1 hour 5 minutes
- Yield: 8 servings
- Diet: Vegetarian
Description
Sticky Pear and Ginger Cake is a moist and warmly spiced dessert made with tender pears, fresh ginger, and a rich syrupy glaze for a comforting, aromatic treat.
Ingredients
- 2 ripe pears, peeled and diced
- 1 3/4 cups all-purpose flour
- 1 tsp baking soda
- 1/2 tsp baking powder
- 1/2 tsp salt
- 1 tsp ground ginger
- 1/2 tsp ground cinnamon
- 1/2 cup unsalted butter, softened
- 3/4 cup brown sugar
- 2 large eggs
- 1/2 cup molasses
- 1/2 cup milk
- 1 tbsp freshly grated ginger
- 1/4 cup golden syrup or honey (for glaze)
Instructions
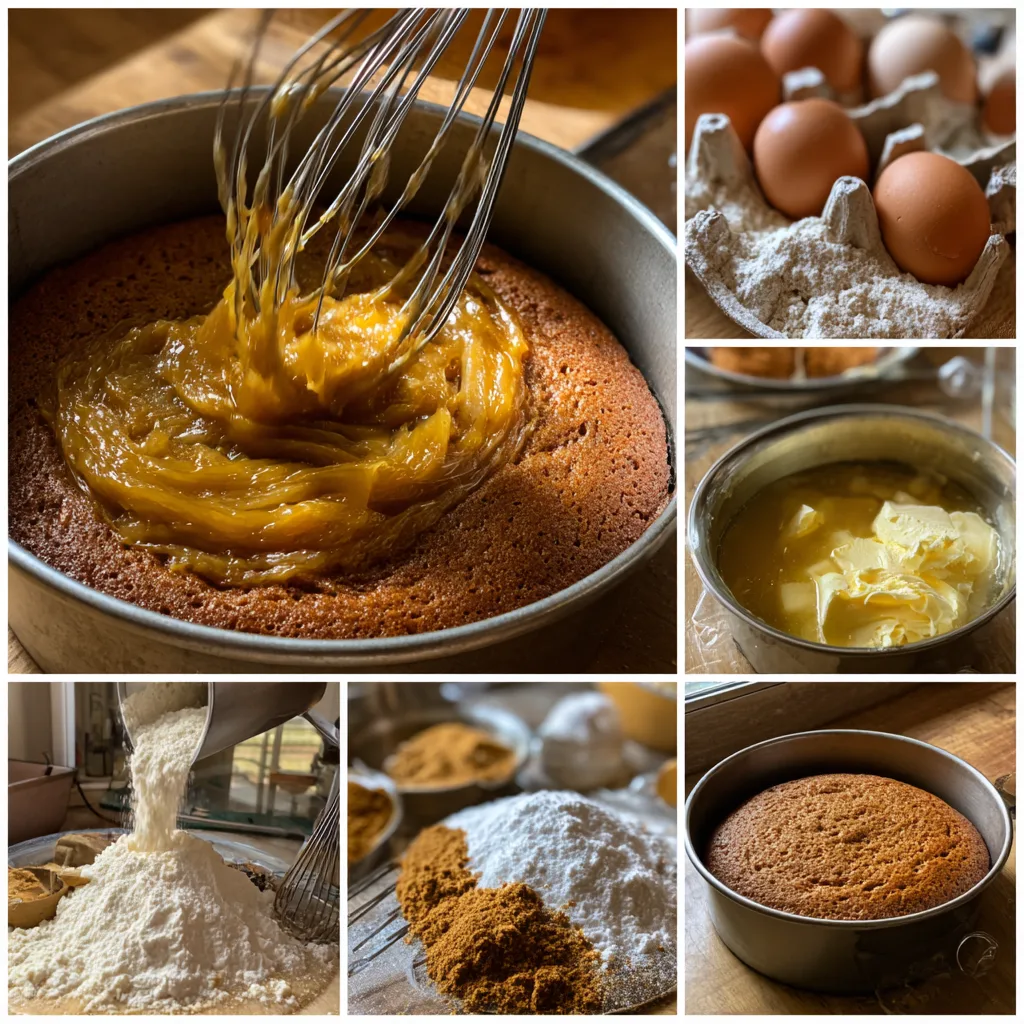
- Preheat oven to 180°C (350°F) and grease an 8-inch cake pan.
- In a bowl, whisk flour, baking soda, baking powder, salt, ground ginger, and cinnamon.
- Cream butter and brown sugar until light and fluffy.
- Add eggs one at a time, mixing well.
- Stir in molasses and freshly grated ginger.
- Alternate adding dry ingredients and milk, mixing until combined.
- Fold in diced pears gently.
- Pour batter into prepared pan.
- Bake for 40–45 minutes until a toothpick inserted comes out clean.
- Warm golden syrup or honey and brush over warm cake.
- Cool slightly before serving.
Notes
- Use ripe but firm pears for best texture.
- Serve warm with whipped cream or custard.
- Store in an airtight container for up to 3 days.
- Prep Time: 20 minutes
- Cook Time: 45 minutes
- Category: Dessert
- Method: Baking
- Cuisine: British-Inspired
Why You’ll Love This Recipe
This cake delivers deep flavor with minimal effort, using simple pantry ingredients to create a moist, warmly spiced dessert that feels special without being complicated.
Ingredients
(Tip: You can find the complete list of ingredients and their measurements in the recipe card below.)
Pears
Ripe but firm pears work best for this cake. They soften as they bake, releasing natural juices that keep the crumb moist and slightly sticky. I prefer using Bartlett or Bosc pears because they hold their shape well while becoming beautifully tender.
Fresh Ginger
Freshly grated ginger provides a bright, aromatic heat that balances the sweetness of the pears. It gives the cake a lively warmth that ground ginger alone cannot achieve.
Ground Ginger
This deepens the spice profile and adds a more rounded, earthy warmth throughout the batter.
All-Purpose Flour
Flour forms the structure of the cake. It creates a tender crumb while still being sturdy enough to support the juicy fruit pieces.
Brown Sugar
Brown sugar brings moisture and a subtle molasses flavor that enhances the sticky texture and rich taste of the cake.
Golden Syrup or Molasses
This ingredient intensifies the sticky quality and gives the cake a deep caramel undertone.
Unsalted Butter
Butter adds richness and ensures a soft, melt-in-your-mouth texture. I once substituted part of the butter with almond milk for a lighter version, and it still turned out beautifully moist.
Eggs
Eggs bind the ingredients together and help the cake rise properly.
Milk
Milk loosens the batter and contributes to the cake’s soft crumb.
Baking Soda
Baking soda reacts with the acidity in the brown sugar and ginger to create lift.
Salt
A small amount of salt enhances all the flavors and balances the sweetness.
Directions
Preheat your oven to 350°F (175°C) and grease an 8-inch round or square cake pan. Line the bottom with parchment paper for easy removal.
Peel and core the pears, then dice them into small, even chunks. If the pears are very juicy, lightly pat them dry to prevent excess moisture in the batter.
In a saucepan over low heat, melt the butter with the brown sugar and golden syrup until smooth. Remove from heat and allow it to cool slightly before stirring in the milk.
In a separate bowl, whisk together the flour, baking soda, ground ginger, and salt. Add the grated fresh ginger to this mixture and stir to distribute evenly.
Beat the eggs lightly, then combine them with the cooled butter mixture. Gradually fold the dry ingredients into the wet ingredients, mixing gently until just combined. Avoid overmixing, as this can make the cake dense.
Fold in the diced pears carefully, ensuring they are evenly distributed throughout the batter.
Pour the batter into the prepared pan and smooth the top. Bake for 40–50 minutes, or until a skewer inserted in the center comes out clean. Allow the cake to cool in the pan for 10–15 minutes before transferring it to a wire rack. Serve warm or at room temperature.
Equipment needed : Must-Have Tools to Get Rolling
Here’s what you’ll want to have on hand:
Silicone Spatula – Durable, heat-resistant silicone spatula perfect for mixing, scraping, and spreading. Gentle on non-stick cookware and easy to clean.
Large pot – You’ll need this to boil the whole cabbage head and soften the leaves.
large bowl –Spacious, durable large bowl ideal for mixing, serving, or food preparation. Made from sturdy material and easy to clean.
Sharp knife – For coring the cabbage and slicing out the thick stem in each leaf. A paring knife works best.
Mixing bowl – A big bowl makes it easier to combine your meat and rice filling evenly.
Cutting board – For prepping cabbage leaves and rolling them like a pro.
Full-Size Blender – is a powerful kitchen appliance for making smoothies, soups, and sauces in large batches.
3-in-1 Air Fryer – This versatile 3-in-1 air fryer offers Air Fry for healthier meals with less oil, Bake for bakery-quality desserts and treats, and Reheat to bring leftovers back to life with crispy, flavorful results
Servings and timing
This recipe yields approximately 8 servings. Preparation time is about 20 minutes, baking time ranges from 40 to 50 minutes, and total time is approximately 1 hour and 10 minutes.
Storage/reheating
Store the cake in an airtight container at room temperature for up to 3 days. For longer storage, refrigerate for up to 5 days. Reheat individual slices in the microwave for 15–20 seconds to restore softness, or warm in a low oven for 5–10 minutes. The cake can also be frozen for up to 2 months; wrap tightly in plastic wrap and foil before freezing.
Variations and Customizations
One of the reasons I return to this recipe often is its flexibility. If you enjoy deeper spice, consider adding a pinch of ground cinnamon, nutmeg, or cloves. These spices pair beautifully with both pear and ginger, adding complexity without overpowering the cake.
For added texture, fold in chopped walnuts or pecans. Their slight bitterness contrasts nicely with the sweetness of the pears and syrup. If you prefer a richer finish, drizzle a simple caramel sauce over the cooled cake or serve it with vanilla custard.
You can also experiment with the fruit. Apples can replace pears for a slightly firmer texture and a more classic flavor. I once tried a half-pear, half-apple combination, and it created a wonderful balance of sweetness and tartness.
To make the cake dairy-free, substitute the butter with plant-based margarine and use almond or oat milk instead of regular milk. The result remains moist and flavorful. For a gluten-free version, use a high-quality gluten-free flour blend designed for baking.
Finally, consider baking the batter in individual muffin tins for portable servings. Reduce the baking time to 20–25 minutes and check for doneness early.
Nutrition and Dietary Info
Approximate nutrition per serving (based on 8 servings):
| Nutrient | Amount per Serving |
|---|---|
| Calories | 320 kcal |
| Protein | 4 g |
| Carbohydrates | 48 g |
| Fat | 12 g |
| Saturated Fat | 7 g |
| Fiber | 2 g |
| Sugar | 28 g |
| Sodium | 220 mg |
Values are estimates and may vary depending on ingredient brands and portion sizes.
Expert Tips & Customizations
Choose Ripe but Firm Pears
Select pears that yield slightly to pressure but are not overly soft for the best texture.
Do Not Overmix
Mix just until combined to keep the crumb tender.
Cool Slightly Before Serving
Allowing the cake to rest enhances its sticky texture and flavor depth.
Enhance the Sticky Finish
Brush the warm cake with a tablespoon of warmed golden syrup for extra shine and moisture.
FAQs
Can I use canned pears instead of fresh?
Yes, but drain them thoroughly and pat dry to avoid excess moisture in the batter.
Can I make this cake ahead of time?
Absolutely. The flavor actually deepens after a day, making it ideal for preparing in advance.
Why is my cake too dense?
Overmixing or using overly ripe, watery pears can result in a dense texture.
Can I reduce the sugar?
You may reduce the sugar slightly, but keep in mind it contributes to the cake’s moisture and sticky texture.
What type of ginger works best?
Fresh ginger provides brightness, while ground ginger adds warmth. Using both creates the best balance.
Can I freeze this cake?
Yes, wrap it tightly and freeze for up to two months. Thaw at room temperature before reheating.
Conclusion
Sticky Pear and Ginger Cake is a beautifully balanced dessert that combines natural fruit sweetness with warm spice and a soft, sticky crumb. It is simple enough for everyday baking yet special enough for gatherings. With its comforting flavors and adaptable nature, this cake is sure to become a treasured recipe in your kitchen.
Hungry for more? Visit our website for full recipes and follow us on Pinterest for daily foodie inspo you’ll love to pin!