Introduction
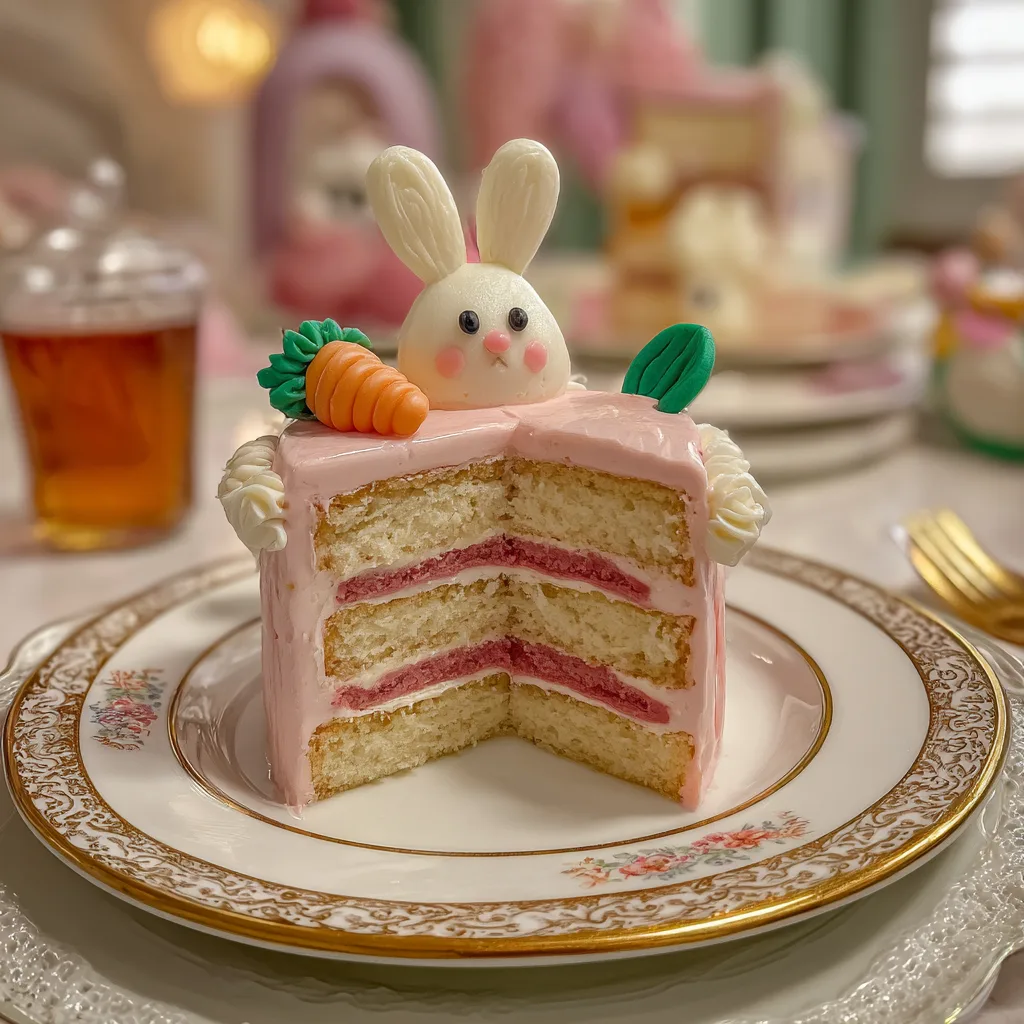
There is something truly delightful about desserts that are both delicious and visually charming, and these Bunny Cakes are exactly that. Soft, fluffy cakes shaped into adorable bunny forms make them perfect for Easter, spring gatherings, or simply adding a bit of fun to your baking. The first time I made these, I decorated them with simple coconut flakes and candy eyes, and they instantly became the highlight of the table.
What makes Bunny Cakes so special is their versatility. You can keep them simple with vanilla flavors or customize them with different frostings, fillings, and decorations. They are not only a treat for the taste buds but also a creative project that both kids and adults can enjoy. Whether you are baking for a celebration or just for fun, these cakes bring joy in every bite.
Print
Bunny Cakes: Adorable, Fluffy, and Perfect for Spring Celebrations
- Total Time: 50 minutes
- Yield: 8 servings
- Diet: Vegetarian
Description
Adorable and festive bunny-shaped cakes decorated with frosting and coconut, perfect for Easter celebrations or fun kids’ treats.
Ingredients
- 1 box vanilla cake mix (or homemade equivalent)
- 3 eggs
- 1/2 cup vegetable oil
- 1 cup milk or water
- 2 cups buttercream frosting
- 1 cup shredded coconut
- Food coloring (pink and other colors as desired)
- Candy decorations (chocolate chips, jelly beans, etc.)
Instructions
- Preheat oven according to cake mix instructions and grease cake pans.
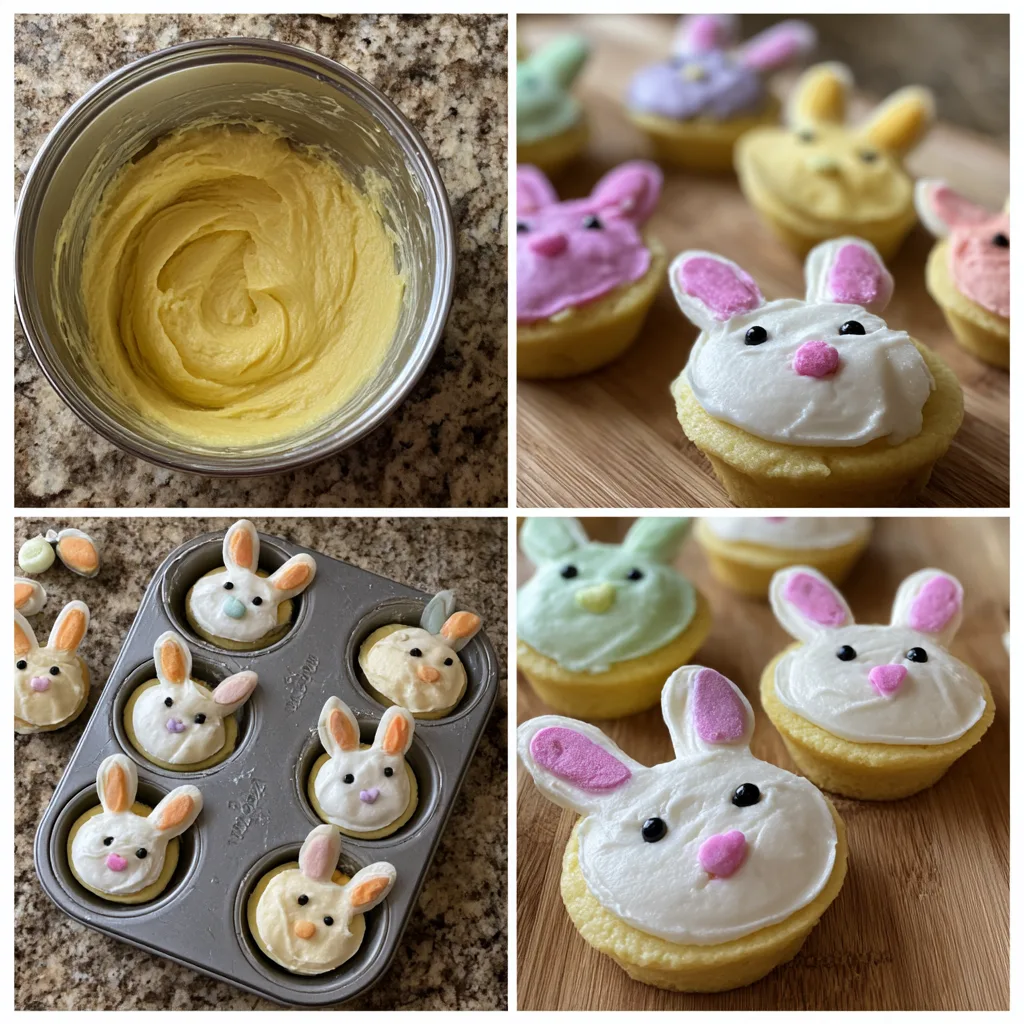
- Prepare cake batter by mixing cake mix, eggs, oil, and milk.
- Pour batter into pans and bake as directed. Let cakes cool completely.
- Cut and arrange cake pieces into bunny shapes (head and ears).
- Frost the entire cake with buttercream.
- Sprinkle shredded coconut over frosting to resemble fur.
- Use food coloring to tint some frosting for decorations.
- Decorate with candies to create eyes, nose, and details.
- Chill slightly before serving to set decorations.
Notes
- You can use round cakes to easily shape bunny faces and ears.
- Store-bought frosting saves time.
- Keep refrigerated if made ahead.
- Get creative with decorations for a fun presentation.
- Prep Time: 20 minutes
- Cook Time: 30 minutes
- Category: Dessert
- Method: Baking
- Cuisine: American
Why You’ll Love This Recipe
These bunny cakes are soft, fluffy, fun to decorate, and perfect for festive occasions or family baking.
Ingredients
(Tip: You can find the complete list of ingredients and their measurements in the recipe card below.)
Flour provides the structure, giving the cakes a soft and stable texture.
Sugar adds sweetness and helps create a tender crumb.
Butter brings richness and enhances the flavor of the cake.
Eggs bind the ingredients and contribute to the fluffy texture.
Milk keeps the batter smooth and results in a moist cake.
Baking powder helps the cakes rise, making them light and airy.
Vanilla extract adds a warm, classic flavor.
Salt balances the sweetness and enhances the taste.
Frosting (buttercream or cream cheese) is used to decorate and add a creamy, sweet finish.
Shredded coconut (optional) creates a fluffy “fur” texture for the bunny design.
Candy decorations such as eyes or sprinkles bring the bunny to life.
Directions
Preheat your oven to 180°C (350°F) and grease your cake pans. In a mixing bowl, cream together the butter and sugar until light and fluffy.
Add the eggs one at a time, mixing well after each addition. Stir in the milk and vanilla extract until combined.
In a separate bowl, whisk together the flour, baking powder, and salt. Gradually add the dry ingredients to the wet mixture, stirring until a smooth batter forms.
Pour the batter into the prepared pans and bake for 20–25 minutes, or until a toothpick inserted in the center comes out clean. Allow the cakes to cool completely.
Once cooled, cut and arrange the cakes into a bunny shape using round cakes or molds. Frost the entire surface evenly.
Decorate with shredded coconut for texture and use candy pieces to create the bunny’s face and features.
Equipment needed : Must-Have Tools to Get Rolling
Here’s what you’ll want to have on hand:
Silicone Spatula – Durable, heat-resistant silicone spatula perfect for mixing, scraping, and spreading. Gentle on non-stick cookware and easy to clean.
Large pot – You’ll need this to boil the whole cabbage head and soften the leaves.
large bowl –Spacious, durable large bowl ideal for mixing, serving, or food preparation. Made from sturdy material and easy to clean.
Sharp knife – For coring the cabbage and slicing out the thick stem in each leaf. A paring knife works best.
Mixing bowl – A big bowl makes it easier to combine your meat and rice filling evenly.
Cutting board – For prepping cabbage leaves and rolling them like a pro.
Full-Size Blender – is a powerful kitchen appliance for making smoothies, soups, and sauces in large batches.
3-in-1 Air Fryer – This versatile 3-in-1 air fryer offers Air Fry for healthier meals with less oil, Bake for bakery-quality desserts and treats, and Reheat to bring leftovers back to life with crispy, flavorful results
Servings and timing
This recipe serves 6 to 8 people, with a preparation time of 20 minutes and a baking time of 25 minutes, totaling about 45 minutes.
Storage/reheating
Store the bunny cakes in an airtight container at room temperature for up to 2 days or in the refrigerator for up to 4 days, and serve at room temperature.
Variations and Customizations
Bunny Cakes are incredibly fun to customize, making them perfect for creative baking. For a chocolate version, you can replace part of the flour with cocoa powder. I tried this once, and it added a rich twist that paired beautifully with cream cheese frosting.
If you want a fruity flavor, consider adding strawberry or lemon zest to the batter. These additions bring brightness and a fresh taste that complements the sweetness.
For a lighter option, you can use whipped frosting instead of buttercream. It creates a softer, less rich finish while still looking beautiful.
You can also experiment with decorations. Instead of coconut, use colored frosting or sprinkles to create different textures and designs.
For individual servings, turn the recipe into cupcakes and decorate each one as a mini bunny face. This makes them perfect for parties and easy to serve.
Nutrition and Dietary Info
| Nutrient | Per Serving |
|---|---|
| Calories | 320 kcal |
| Protein | 5 g |
| Carbs | 40 g |
| Fat | 16 g |
| Saturated Fat | 9 g |
| Fiber | 1 g |
| Sugar | 24 g |
| Sodium | 180 mg |
Expert Tips & Customizations
Cool cakes completely
Prevents frosting from melting.
Use a template
Helps shape the bunny evenly.
Apply crumb coat first
Creates a smooth final finish.
Decorate creatively
Customize with different toppings.
Keep portions even
Ensures balanced baking and texture.
FAQs
Can I use a cake mix?
Yes, it is a quick and convenient option.
How do I shape the bunny?
Use round cakes and cut pieces to form ears and bow.
Can I make this ahead of time?
Yes, bake the cake a day in advance and decorate later.
What frosting works best?
Buttercream or cream cheese frosting both work well.
Can I freeze the cake?
Yes, freeze unfrosted cake layers for up to 2 months.
Is this recipe kid-friendly?
Absolutely, kids love both making and decorating these cakes.
Conclusion
These Bunny Cakes are the perfect combination of fun, creativity, and delicious flavor. With their soft texture and adorable design, they are ideal for celebrations and family moments. Easy to customize and enjoyable to make, this recipe brings both joy and sweetness to any occasion.
Hungry for more? Visit our website for full recipes and follow us on Pinterest for daily foodie inspo you’ll love to pin!