Introduction
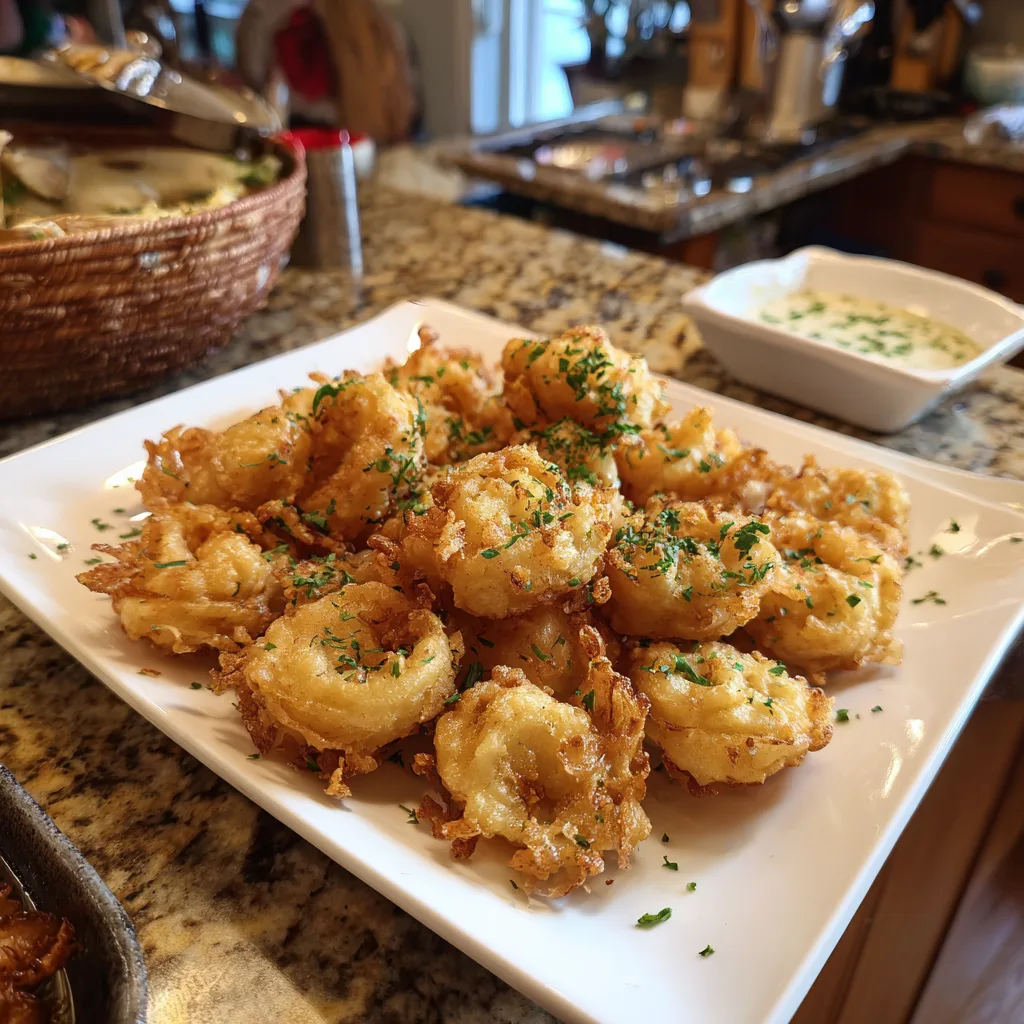
Mini Bloomin’ Onions are a fun and flavorful twist on the classic steakhouse appetizer. Instead of preparing one large onion, this recipe creates individual, bite-sized versions that are perfectly crisp and easy to serve. Each onion is cut into a blooming shape, coated in seasoned batter, and fried until deeply golden and crunchy. The result is a snack that delivers bold flavor and satisfying texture in every bite. The first time I made these at home, I was surprised by how beautifully they crisped when double-dipped in the coating. I once added a small pinch of smoked paprika to the flour mixture, and it enhanced the overall depth without overpowering the onions. Whether served as a party appetizer or a game-day snack, these mini bloomin’ onions offer that irresistible combination of crispy exterior and tender interior.
Print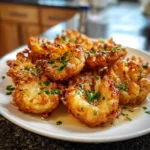
Mini Bloomin’ Onions: Extra Crispy, Golden, and Irresistibly Crunchy
- Total Time: 35 minutes
- Yield: 4 servings
- Diet: Vegetarian
Description
Crispy mini bloomin’ onions made from sweet onion wedges coated in seasoned batter and fried until golden and crunchy. Served with a creamy spicy dipping sauce, they’re the perfect crowd-pleasing appetizer.
Ingredients
- 2 large sweet onions, cut into wedges (petals separated)
- 1 cup all-purpose flour
- 1/2 cup cornstarch
- 1 tsp paprika
- 1 tsp garlic powder
- 1/2 tsp cayenne pepper
- 1 tsp salt
- 1/2 tsp black pepper
- 1 cup buttermilk
- 1 large egg
- Vegetable oil for frying
- 1/2 cup mayonnaise (for dipping sauce)
- 1 tbsp ketchup (for dipping sauce)
- 1 tsp horseradish (optional)
- 1/2 tsp paprika (for sauce)
Instructions
- Separate onion wedges into individual petals.
- In a bowl, whisk flour, cornstarch, paprika, garlic powder, cayenne, salt, and pepper.
- In another bowl, whisk buttermilk and egg together.
- Dip onion petals into flour mixture, then into buttermilk mixture, then back into flour mixture for double coating.
- Heat oil in a deep pot to 350°F (175°C).
- Fry onion petals in batches for 2-3 minutes until golden brown and crispy.
- Remove and drain on paper towels.
- Mix mayonnaise, ketchup, horseradish, and paprika for dipping sauce.
- Serve hot with dipping sauce.
Notes
- Do not overcrowd oil to maintain crispiness.
- For a lighter version, air fry at 400°F for 10-12 minutes.
- Use sweet onions like Vidalia for best flavor.
- Best served immediately while crispy.
- Prep Time: 20 minutes
- Cook Time: 15 minutes
- Category: Appetizer
- Method: Frying
- Cuisine: American
Why You’ll Love This Recipe
This recipe delivers maximum crunch with bold seasoning. Individual portions make them easier to serve and share. The batter creates a crisp coating that stays crunchy when properly fried. They pair perfectly with creamy dipping sauces. The recipe can also be adapted for baking or air frying.
Ingredients
(Tip: You can find the complete list of ingredients and their measurements in the recipe card below.)
Small Sweet Onions
Small sweet onions are ideal for mini versions, providing mild flavor and tender centers.
All-Purpose Flour
Flour forms the base of the crispy coating.
Cornstarch
Cornstarch enhances crispiness and helps create a lighter crust.
Eggs
Eggs bind the coating to the onion and contribute structure.
Buttermilk
Buttermilk tenderizes and adds slight tang while helping the batter adhere.
Garlic Powder
Garlic powder provides savory depth.
Paprika
Paprika adds warmth and subtle color.
Cayenne Pepper
Cayenne introduces mild heat.
Salt
Salt enhances overall flavor.
Black Pepper
Freshly ground black pepper adds complexity.
Vegetable Oil
Vegetable oil is used for deep frying and ensures even, golden crispness.
Directions
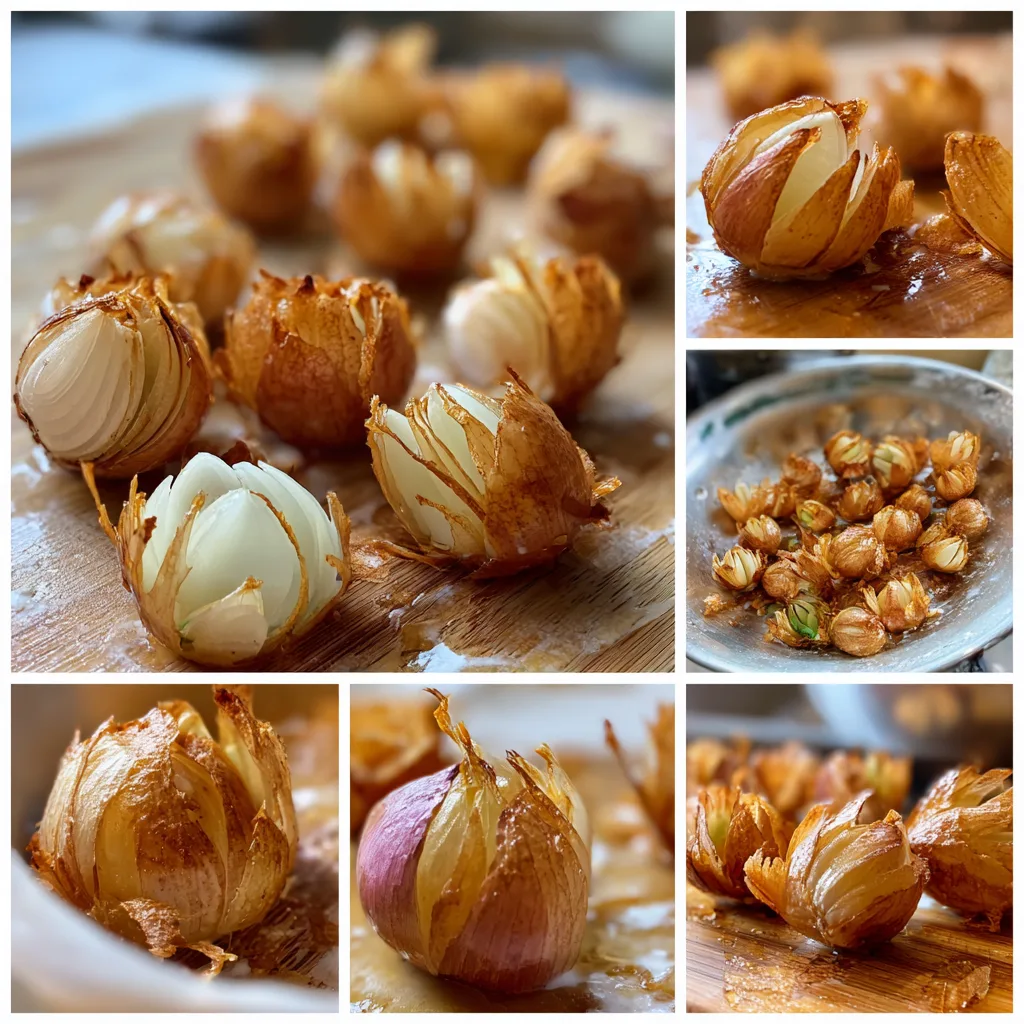
Peel the small sweet onions and trim the root end slightly without cutting it off completely. Using a sharp knife, make vertical cuts from the top down toward the root, dividing the onion into sections while keeping the base intact. Gently spread the layers to create a blooming effect.
In one bowl, whisk together flour, cornstarch, garlic powder, paprika, cayenne pepper, salt, and black pepper. In another bowl, whisk eggs and buttermilk until smooth.
Dip each onion first into the flour mixture, ensuring all layers are coated. Then dip into the egg mixture, allowing excess to drip off. Return to the flour mixture for a second coating to ensure maximum crispiness.
Heat vegetable oil in a deep pot to 350°F (175°C). Carefully lower each onion into the hot oil and fry for 3–4 minutes until golden brown and crisp. Fry in batches to avoid overcrowding.
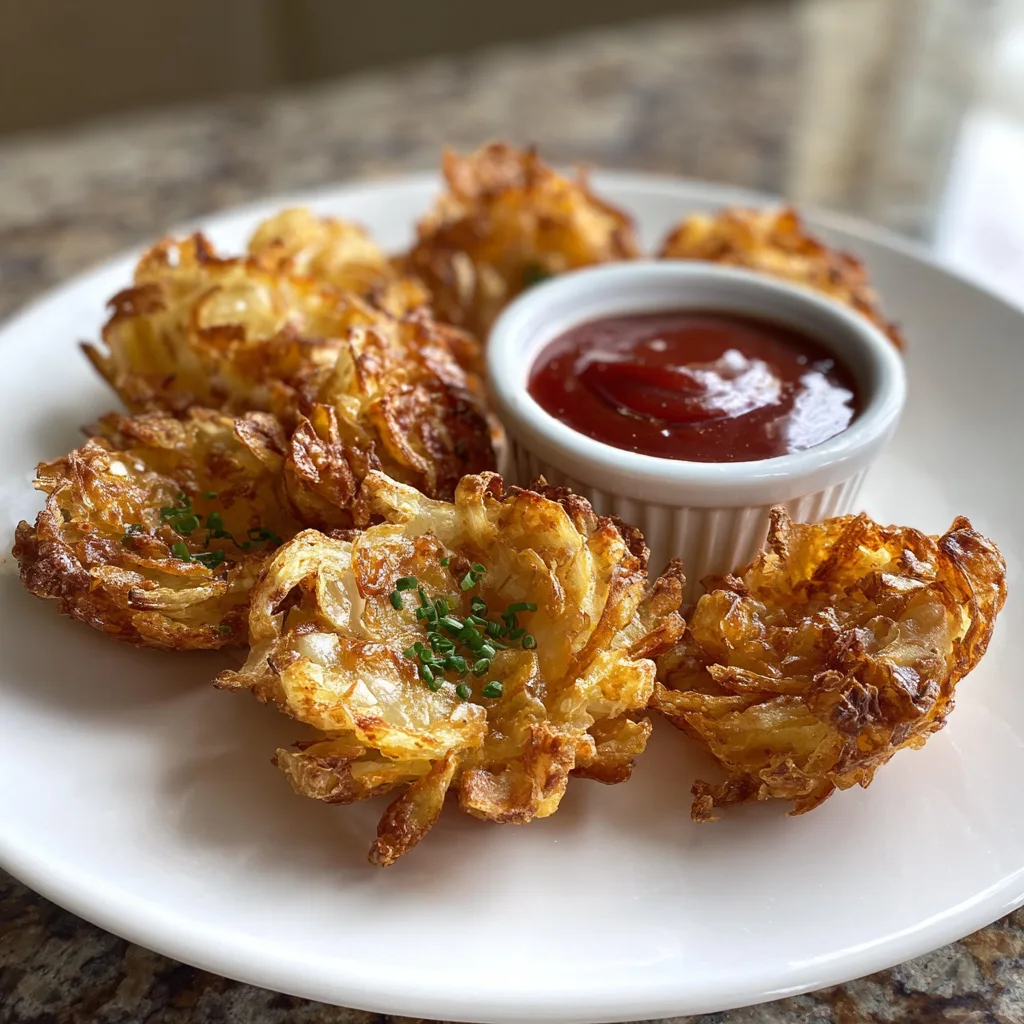
Remove and drain on paper towels. Serve immediately with your preferred dipping sauce.
Equipment needed : Must-Have Tools to Get Rolling Here’s what you’ll want to have on hand:
Here’s what you’ll want to have on hand:
Silicone Spatula – Durable, heat-resistant silicone spatula perfect for mixing, scraping, and spreading. Gentle on non-stick cookware and easy to clean.
Large pot – You’ll need this to boil the whole cabbage head and soften the leaves.
large bowl –Spacious, durable large bowl ideal for mixing, serving, or food preparation. Made from sturdy material and easy to clean.
Sharp knife – For coring the cabbage and slicing out the thick stem in each leaf. A paring knife works best.
Mixing bowl – A big bowl makes it easier to combine your meat and rice filling evenly.
Cutting board – For prepping cabbage leaves and rolling them like a pro.
Full-Size Blender – is a powerful kitchen appliance for making smoothies, soups, and sauces in large batches.
3-in-1 Air Fryer – This versatile 3-in-1 air fryer offers Air Fry for healthier meals with less oil, Bake for bakery-quality desserts and treats, and Reheat to bring leftovers back to life with crispy, flavorful results
Servings and timing
This recipe serves 4–6 people as an appetizer.
Preparation time: 20 minutes
Cooking time: 15 minutes
Total time: 35 minutes
Storage/reheating
Mini bloomin’ onions are best enjoyed fresh. Store leftovers in an airtight container in the refrigerator for up to 2 days. Reheat in a 375°F (190°C) oven or air fryer for 8–10 minutes to restore crispness. Avoid microwaving, as it will soften the coating.
Variations and Customizations
For a baked version, place coated onions on a lined baking sheet, spray lightly with oil, and bake at 425°F (220°C) for 20–25 minutes until crisp. Air frying at 375°F (190°C) for 12–15 minutes also works well.
To create a gluten-free option, substitute the flour with a gluten-free blend and ensure cornstarch is certified gluten-free.
For extra crunch, add a small amount of panko breadcrumbs to the flour mixture. I once mixed a bit of grated Parmesan into the coating, and it added subtle savory richness.
You may adjust the spice level by increasing cayenne or adding chili powder. Pair the onions with a creamy dipping sauce made from mayonnaise, ketchup, horseradish, and a dash of paprika for a classic accompaniment.
Nutrition and Dietary Info
Per serving (based on 6 servings):
| Nutrient | Amount |
|---|---|
| Calories | 320 kcal |
| Protein | 6 g |
| Carbs | 38 g |
| Fat | 16 g |
| Saturated Fat | 3 g |
| Fiber | 3 g |
| Sugar | 6 g |
| Sodium | 520 mg |
Deep frying increases fat content; baking or air frying can reduce overall calories and fat.
Expert Tips & Customizations
Double Coat for Crispiness
The second dredge ensures maximum crunch.
Maintain Oil Temperature
Consistent heat prevents greasy texture.
Do Not Overcrowd
Fry in batches for even browning.
Spread the Layers Gently
Proper blooming helps the coating reach every section.
Serve Immediately
Crispness is best when hot and fresh.
FAQs
Can I make these ahead of time?
They are best served immediately, but you can prep and refrigerate before frying.
How do I keep them crispy?
Maintain proper oil temperature and avoid covering after frying.
Can I use large onions?
Yes, but cooking time may need to be adjusted.
What oil is best for frying?
Vegetable or canola oil works well due to high smoke points.
Are they very spicy?
The heat level is moderate and can be adjusted.
Can I freeze them?
It is not recommended, as the coating may lose texture.
Conclusion
Mini Bloomin’ Onions deliver bold flavor and irresistible crunch in convenient individual portions. With a perfectly seasoned coating and tender interior, they recreate the beloved steakhouse appetizer in a fun and shareable format. Whether fried, baked, or air-fried, this recipe ensures a satisfying and crispy result every time.
Hungry for more? Visit our website for full recipes and follow us on Pinterest for daily foodie inspo you’ll love to pin!